Smart LED strip lighting has evolved from a novelty item into a legitimate tool for homeowners looking to upgrade their spaces with flexible, energy-efficient illumination. These adhesive-backed strips pack RGB color-changing LEDs and wireless connectivity into a low-profile format that fits where traditional fixtures can’t. Whether someone’s looking to add task lighting under kitchen cabinets, create ambient backlighting behind a TV, or highlight architectural details, smart LED strips offer control through smartphone apps, voice commands, and automation routines. This guide covers what makes these strips “smart,” where they work best, and how to choose and install them without creating a fire hazard or wasting money on incompatible gear.
Table of Contents
ToggleKey Takeaways
- Smart LED strip lighting consumes 75-80% less electricity than incandescent lighting and costs roughly $1.50 per month to operate, making them an energy-efficient upgrade for any room.
- Smart LED strips work best in kitchens (under-cabinet task lighting), living rooms (TV backlighting), and staircases, with proper placement and diffusers dramatically improving both function and appearance.
- Choose strips based on your needs: tunable white or RGBW for kitchens where color accuracy matters, 24V systems for runs longer than 16 feet, and high LED density (120-144 per meter) for close-range visibility without dotted appearance.
- Surface preparation using isopropyl alcohol and aluminum mounting channels are essential for long-lasting adhesion and professional appearance, while solderless connectors simplify cutting and reconnecting sections.
- Verify UL or ETL certification, match transformer wattage to total strip consumption (20% higher), and use 2.4GHz Wi-Fi for smart home integration to avoid performance issues and overheating risks.
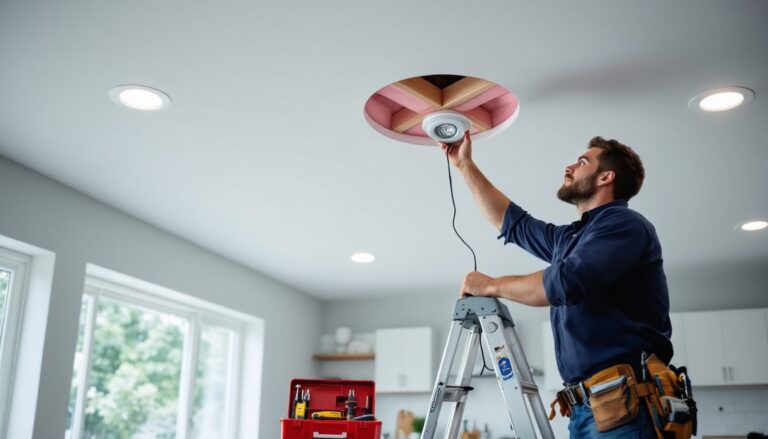
What Is Smart LED Strip Lighting and How Does It Work?
Smart LED strip lighting consists of flexible circuit boards embedded with surface-mount LEDs (typically SMD 5050 or SMD 2835 chips), a protective coating, and an adhesive backing. The “smart” component comes from an integrated controller or separate hub that connects to Wi-Fi, Bluetooth, or proprietary protocols like Zigbee or Z-Wave.
The strips receive power from a 12V or 24V DC transformer (included with most kits) that plugs into standard 120V household outlets. Higher-voltage 24V systems run cooler and allow longer continuous runs, up to 32 feet before experiencing voltage drop, compared to 12V strips that max out around 16 feet before brightness fades noticeably at the far end.
Control happens through dedicated smartphone apps, voice assistants (Alexa, Google Assistant, Siri), or physical remotes. Users can adjust brightness, switch between millions of RGB colors, set timers, and sync lights to music or screen content. Advanced models support RGBW (adding a dedicated white LED) or RGBIC (individually addressable LEDs) for gradient effects and multiple colors displayed simultaneously along one strip.
The controller communicates with the LED driver circuitry to pulse-width modulate (PWM) the current, rapidly switching LEDs on and off to create the perception of dimming or color mixing. Quality matters here, cheap controllers produce visible flicker at lower brightness levels, especially noticeable on camera and to sensitive individuals.
Top Benefits of Installing Smart LED Strips in Your Home
Energy efficiency sits at the top of the list. LED strips consume 75-80% less electricity than equivalent incandescent lighting, with most 16-foot strips drawing just 24-40 watts at full brightness. At $0.13 per kWh (national average), running a strip 8 hours daily costs roughly $1.50 per month.
Flexibility in placement beats rigid fixtures. The thin profile (typically 8-10mm wide and 2-3mm thick) lets strips tuck into cove molding, behind headboards, inside closets, or along stair risers where conventional lighting won’t fit. Cut points every 1-2 inches (marked with scissor icons) allow precise length customization, though cutting voids most warranties.
Customizable ambiance changes room mood without repainting or buying new decor. Warm white (2700K-3000K) creates cozy spaces, cool white (5000K-6500K) aids task work, and RGB colors set party scenes or holiday themes. Automation routines can gradually brighten lights to simulate sunrise or dim them at bedtime without touching a switch.
Low heat output makes them safer than halogen alternatives in enclosed spaces. Quality LED strips stay cool enough to touch even after hours of operation, reducing fire risk in tight installations like inside cabinets or behind fabric.
Integration with smart home ecosystems means these lights work with existing platforms rather than requiring separate apps. Once connected, they respond to the same voice commands and automation triggers as smart thermostats, locks, and cameras, creating cohesive whole-home control. Many homeowners appreciate features similar to adaptive lighting technologies that automatically adjust color temperature throughout the day.
Best Places to Use Smart LED Strip Lighting
Kitchen and Under-Cabinet Lighting
Kitchen installations deliver both function and form. Under-cabinet strips mounted to the bottom of wall cabinets eliminate shadows on countertops where food prep happens. Install them 2-3 inches from the front edge to avoid glare, and use aluminum channels with frosted diffusers to hide individual LED dots and create an even light bar.
For best results, choose high-CRI strips (Color Rendering Index above 90) that accurately show food colors, cheap RGB strips make raw chicken look unappetizing. Brightness matters here: aim for 300-450 lumens per linear foot for task lighting. A standard 3-foot section of upper cabinet needs roughly 1,000 lumens total.
Inside cabinets and pantries, motion-activated strips eliminate fumbling for switches when hands are full. Battery-powered options work for renters or spaces without nearby outlets, though they lack smart features and require AA or AAA battery replacement every 3-6 months.
Toe-kick lighting along base cabinets adds a modern touch and serves as low-level nighttime navigation. Mount strips to the recessed toe-kick board or inside the space, directed downward. Keep brightness below 100 lumens here to avoid blinding anyone grabbing midnight snacks.
Living Rooms and Entertainment Areas
Behind wall-mounted TVs, LED strips reduce eye strain during movie watching by creating gentle backlighting that minimizes the contrast between bright screens and dark walls. This bias lighting effect genuinely improves viewing comfort, especially in dim rooms.
Mount strips along the back perimeter of the TV, avoiding direct exposure to viewers. For a 55-inch TV, a 6-8 foot strip provides adequate coverage. Screen-sync features on some models (using HDMI input or camera sensors) match strip colors to on-screen content, though opinions divide on whether this enhances or distracts from viewing.
Cove lighting along ceiling molding or behind floating shelves creates indirect ambient light that’s easier on the eyes than overhead fixtures. This technique works especially well in rooms with crown molding or stepped ceilings where strips can hide completely while washing walls with color. Designers on platforms like Houzz frequently showcase these indirect lighting techniques for modern living spaces.
Entertainment centers and media consoles benefit from internal strip lighting that highlights collectibles or gaming equipment. Glass shelves with edge-mounted strips create dramatic display cases, though ensure strips are rated for enclosed spaces if ventilation is limited.
Stair risers represent a practical safety application, illuminating each step prevents trips during nighttime bathroom runs. Motion sensors or schedule-based automation ensures lights activate only when needed, conserving energy. Many technology reviewers, including those at Digital Trends, highlight smart home lighting as a key component of connected living spaces.
How to Choose the Right Smart LED Strip Lights
Voltage and length determine compatibility. Match voltage (12V or 24V) between strips and power supplies, mixing them damages LEDs. For runs longer than a single strip’s maximum (usually 16 or 32 feet), add a second power injection point rather than daisy-chaining beyond the rated length. Voltage drop causes dimming at the far end and shortens LED lifespan.
LED density affects brightness and smoothness. Strips with 60 LEDs per meter suit general ambient lighting, while 120 or 144 LEDs per meter provide brighter, more uniform output for task lighting or close-up viewing. Higher density costs more but eliminates the “dotted” appearance when viewed at close range or reflected in glossy surfaces.
IP ratings indicate water and dust resistance. IP20 (no protection) works for dry indoor areas like bedrooms. IP65 (water-resistant coating) handles kitchens and bathrooms where splashes occur. IP67 or IP68 (fully waterproof) suits outdoor installations or direct contact with moisture, though these thicker coatings make strips less flexible and harder to cut cleanly.
Color options break into several categories. Single-color white strips offer just one color temperature. Tunable white adjusts from warm to cool (2700K-6500K) but no colors. RGB provides red, green, blue mixing but weak white output. RGBW adds a dedicated white LED for better neutral tones. RGBIC (or RGBWW) allows different colors along the strip simultaneously with addressable segments.
For serious kitchen work or reading spaces, skip RGB and choose tunable white or dedicated warm/cool white strips with CRI above 90. The dedicated white LEDs produce cleaner, brighter light than RGB mixing, which tends toward purple-ish whites. Reviews from sources like Tom’s Guide often compare color quality across different smart lighting products.
Connectivity protocol affects reliability and compatibility. Wi-Fi strips connect directly to routers without hubs but may clog 2.4GHz networks if adding many devices. Bluetooth works for single-room control within 30 feet but can’t be controlled remotely or integrated with home automation platforms. Zigbee and Z-Wave require separate hubs but create more stable mesh networks that extend range and reduce lag.
Check which voice assistants and platforms the strips support before purchasing. Not all work with HomeKit, and some require separate apps that don’t integrate with competitors’ ecosystems.
Wattage and transformer sizing must match. Add up the total wattage of all strips on one circuit, then choose a power supply rated 20% higher than that total to prevent overheating and ensure longevity. A 16-foot strip drawing 40W needs at least a 50W transformer. Undersized power supplies fail prematurely and can create fire hazards.
Installation Tips for DIY Success
Surface preparation determines how long strips stay stuck. Wipe mounting surfaces with isopropyl alcohol and let dry completely, grease, dust, or moisture cause adhesive failure within weeks. Rough or porous surfaces (bare wood, textured paint, concrete) may need mounting clips or aluminum channels instead of relying on adhesive backing alone.
Channels serve multiple purposes: they diffuse light, protect strips, allow mounting on difficult surfaces, and dissipate heat. Aluminum channels with frosted covers cost $8-15 per 3-foot section but dramatically improve appearance and longevity. Mount channels first, then press strips into the track.
Plan power access before starting. Transformers need to plug into standard outlets, and hiding bulky wall-wart power supplies takes forethought. Inside cabinets, behind entertainment centers, or in basement drop ceilings work well. For outdoor applications similar to LED exterior lighting, use weatherproof junction boxes and GFCI-protected outlets.
Cutting and connecting requires attention to marked cut points. Cut only on the designated lines (typically every 1-2 inches marked with scissor symbols and copper pads). To reconnect cut sections, use solderless connectors ($5-10 for 10-packs) that clip onto the copper pads, no soldering iron needed, though soldered connections prove more reliable for permanent installations.
For corners, use L-shaped connectors or flexible corner pieces rather than bending strips beyond their minimum bend radius (typically 1-2 inches for standard strips). Forcing sharp bends cracks internal traces and creates dark spots.
Wire management keeps installations looking professional. Run low-voltage DC wiring along cabinet backs, behind baseboards, or through cable raceways. Keep DC wiring separate from AC electrical lines, while not strictly code-required for low-voltage, it’s good practice and avoids electromagnetic interference.
Safety considerations for LED strips are minimal but not zero. Use only UL-listed or ETL-certified products with proper power supplies. The DC side (after the transformer) poses no shock risk, but overloaded transformers or damaged strips can overheat. Never cover transformers with insulation or trap them in unventilated spaces.
For installations in walls or ceilings, verify local electrical code requirements. While low-voltage LED strips typically don’t require permits, any 120V wiring to add outlets or hardwire transformers does. When in doubt, consult local building authorities.
Testing before final mounting saves frustration. Connect the full run, power it on, and verify even brightness and color before peeling all the adhesive backing. Finding a defective section after it’s stuck in a tight spot means either living with it or starting over.
Many homeowners find inspiration and installation guidance at retailers with extensive lighting departments that display various smart lighting options and offer in-person advice.
Set up smart controls and automation routines after physical installation is complete. Most apps walk through the connection process, though 2.4GHz Wi-Fi networks work better than 5GHz for most smart lights. Name strips logically (“Kitchen Counter” not “Strip 1”) to avoid confusion when voice-controlling multiple zones.